PixVerse V6 and V6 Max Review: 4 Real Tests, Prompts and Pricing
We tested PixVerse V6 and V6 Max with four video generations: animating a photo, transitioning between keyframes, creating a dance scene from a reference, and extending a clip. Here are the prompts, results, generation times, and exact credit costs.
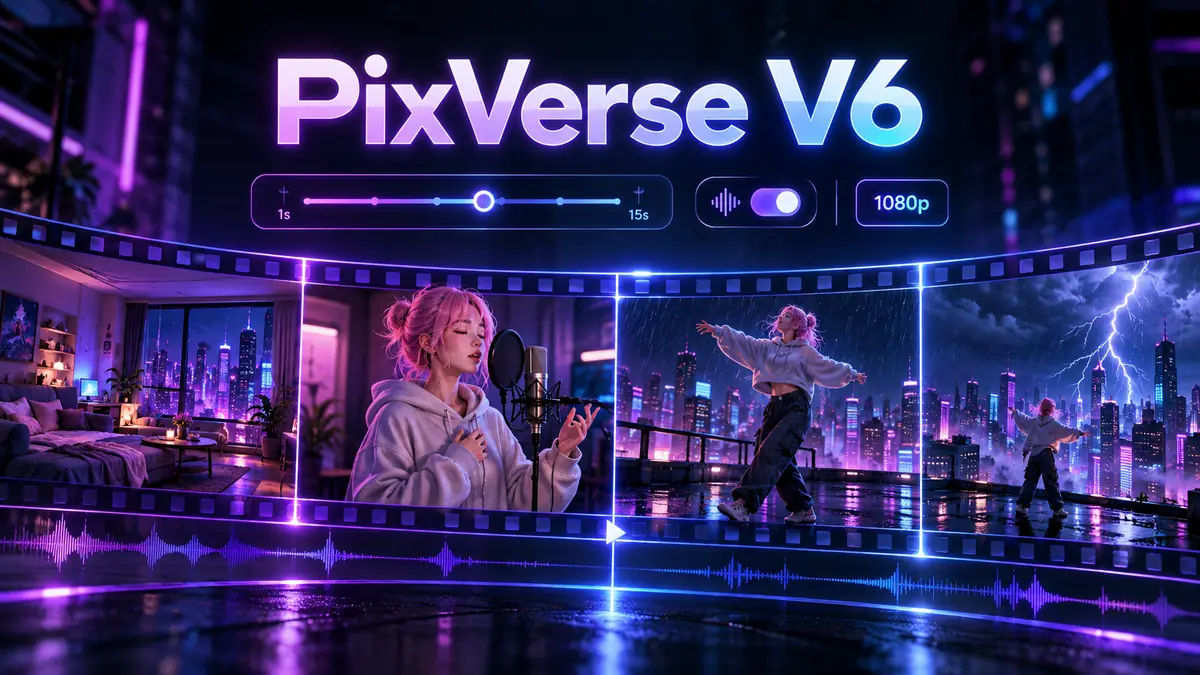
PixVerse V6 is an AI video generator that turns text prompts and still images into short video clips. It can animate characters, create camera movements, add music and sound effects, and generate dialogue with lip synchronization. Two versions became available in Neuromia in October 2026: PixVerse V6 and PixVerse V6 Max. Both support videos up to 15 seconds per generation, resolutions up to 1080p, and optional synchronized audio.
For this PixVerse V6 and V6 Max review, we ran four hands-on tests using the same starting image: a pink-haired anime-style character in a neon-lit apartment. We animated the portrait, transformed one image into another, created a dance scene using a reference, and extended an existing video. The four generations used 295.68 credits in total.
Our takeaway: V6 Max handled photo animation well, preserving the character and surrounding room. Standard V6 offered more creative control through start-to-end transitions, image references, multi-shot generation, and video extension. Below, we'll share the exact prompts, settings, generation times, costs, and results, along with practical instructions for using PixVerse in Neuromia.
What's New in PixVerse V6, and How Is V6 Max Different?
The biggest difference between the two versions isn't resolution or maximum video length. It's the range of generation modes available.
PixVerse V6 Max generates videos from text or a starting image. It supports structured scenes with shot-by-shot instructions and camera directions. Its strengths include maintaining consistent characters, products, packaging, and visible text across frames, along with realistic-looking skin, fabrics, and lighting.
PixVerse V6 includes the same core capabilities but adds four creative tools:
- Start-to-end transition: Upload the first and last frames and generate a smooth transformation between them.
- Reference-based scene: Use 1–7 images to define characters, objects, and backgrounds.
- Multi-clip: Generate multiple shots with changing camera angles from a text prompt or one starting image.
- Video extension: Continue an existing PixVerse clip by another 1–15 seconds.
PixVerse V6 vs. V6 Max: Feature Comparison
| Feature | PixVerse V6 | PixVerse V6 Max |
|---|---|---|
| Text-to-video | Yes | Yes |
| Image-to-video | Yes | Yes |
| Video duration | 1–15 seconds | 1–15 seconds |
| Resolution | 360p–1080p | 360p–1080p |
| Audio generation | Yes | Yes |
| Structured scenes and camera control | Yes | Yes |
| Seed for repeatability | Yes | Yes |
| Start-to-end frame transitions | Yes | No |
| 1–7 image references | Yes | No |
| Multi-clip generation | Yes | No |
| Video extension | Yes | No |
| 720p with audio | 10.56 credits/sec | 13.2 credits/sec |
Both models support eight aspect ratios: 16:9, 4:3, 1:1, 3:4, 9:16, 2:3, 3:2, and 21:9. When generating video from an image, the output follows the source image's proportions.
Prompts can contain up to 5,000 characters. You can write detailed instructions covering character actions, camera movements, lighting, and sound.
Which Version Should You Choose?
Both models can animate a still image. V6 Max is worth trying when preserving visual details is especially important, whether you're working with a character, a product, or a carefully composed scene.
Choose V6 if you need a specific ending frame, multiple image references, different camera angles, or the ability to extend a completed clip. It also costs fewer credits than V6 Max at equivalent resolution, duration, and audio settings.
Both versions are available in Neuromia. You can try PixVerse in the video editor, upload an image or enter a prompt, select your settings, and check the credit cost before generating.
Hands-On PixVerse Tests: 4 Videos We Created
For all four tests, we used the same source image: an anime-style girl with pink hair in a cozy apartment illuminated by purple neon lighting. A nighttime city skyline was visible through the window.
This gave us a consistent starting point for checking whether PixVerse could preserve the character's appearance, clothing, and environment while introducing new movements and camera angles.
All four generations used 720p resolution with audio enabled. Image-based clips followed the source image's aspect ratio. Generation times are approximate.
Test 1. PixVerse V6 Max: Animating a Photo in 8 Seconds
Goal: Turn a static portrait into a short animated scene. We wanted the character to look toward the camera, smile, and adjust her hair while keeping the original apartment recognizable.
Settings:
| Setting | Value |
|---|---|
| Model | PixVerse V6 Max |
| Mode | Image-to-video |
| Duration | 8 seconds |
| Resolution | 720p |
| Audio | Enabled |
| Cost | 105.6 credits |
| Generation time | About 2 minutes |
Our prompt:
She slowly turns her head toward the camera, smiles gently, and brushes a strand of pink hair away from her face. A neon heart flickers on the wall, city lights shimmer outside the window, and the camera slowly pushes in with a cinematic movement. Soft ambient music plays in the background.
What happened
PixVerse preserved both the character and the room. The girl turned toward the viewer, smiled, adjusted her hair, and even waved at the camera. The neon atmosphere remained recognizable, and the generated clip included audio.
One interesting detail: we never requested the wave. The model added that gesture on its own.
It worked naturally within the scene, but it also illustrates a limitation of AI video generation. Even a detailed prompt doesn't guarantee that the model will follow every instruction literally or avoid adding small actions.
Verdict: V6 Max is a useful option for animating portraits and existing artwork when you want to introduce character movement and camera motion without changing the overall composition.
Test 2. PixVerse V6: Transition Between Two Frames in 5 Seconds
Our second experiment focused on one of standard V6's most interesting features: generating a transition between two specified images.
Goal: Transform the original character into a version of herself standing at a studio microphone.
The first frame was our original neon apartment image. For the final frame, we used another image of the same character wearing a purple hoodie beside a microphone.
Settings:
| Setting | Value |
|---|---|
| Model | PixVerse V6 |
| Mode | Start-to-end frame transition |
| First frame | Original character image |
| Last frame | Character in a hoodie at a microphone |
| Duration | 5 seconds |
| Resolution | 720p |
| Audio | Enabled |
| Cost | 52.8 credits |
| Generation time | About 1.5 minutes |
Our prompt:
A smooth cinematic transformation: the girl stands up, her outfit gradually changes into a cozy hoodie with neon stripes, a studio microphone appears, and she begins singing. Warm neon lighting and soft pop music accompany the transformation.
What happened
The character's outfit changed smoothly, a microphone appeared, and she began singing. The model connected the two reference frames into a continuous visual transformation.
This is significantly different from ordinary image-to-video generation.
With standard image animation, you provide the beginning of a scene and describe what should happen next. With a start-to-end transition, PixVerse has two visual anchors: the opening frame and the desired ending.
That makes the mode useful for outfit changes, product transformations, before-and-after sequences, and short creative advertisements.
Verdict: If you need a particular final composition, uploading the ending image gives the model a clearer target than describing that frame entirely through text.
Test 3. PixVerse V6: Dance Scene From an Image Reference
Next, we tested whether V6 could use an existing character as a reference while creating a completely different scene.
Goal: Move our character from the apartment to a rooftop overlooking a city at night. She should dance in light rain while the camera circles around her.
The reference mode accepts up to seven images. You can refer to them inside the prompt using labels such as @image_1, @image_2, and so on.
For this test, we used the original character image as our reference.
Settings:
| Setting | Value |
|---|---|
| Model | PixVerse V6 |
| Mode | Reference-based scene |
| Reference | Original character image |
| Duration | 8 seconds |
| Resolution | 720p |
| Audio | Enabled |
| Cost | 84.48 credits |
| Generation time | About 2 minutes |
Our prompt:
@image_1 dances energetically on a neon-lit rooftop at night in light rain. Skyscraper lights glow behind her, the camera orbits around her, and upbeat electronic music plays.
What happened
The finished video showed a recognizable version of our character dancing on a rooftop, surrounded by rain and nighttime city lights. The camera movement gave the scene a more dynamic appearance.
This wasn't simply an animated version of the original photograph. PixVerse used the character as a visual reference while constructing a new setting and action.
That makes the feature particularly interesting for creating a series of clips featuring the same character or product.
You can provide separate images for characters, objects, and backgrounds. The last uploaded reference can also be assigned as the scene background.
However, our test used only one reference image. We didn't test how accurately the model handles all seven references simultaneously.
Verdict: Reference-based generation is useful when you want a recognizable subject to appear in a new environment without repeatedly describing its appearance.
Test 4. PixVerse V6: Extending an Existing Video by 5 Seconds
After the third test, we had an eight-second rooftop dance sequence. Instead of generating another video from scratch, we decided to continue the existing clip.
Goal: Make the dance more energetic, intensify the rain, introduce lightning above the city, and move the camera upward.
Settings:
| Setting | Value |
|---|---|
| Model | PixVerse V6 |
| Mode | Video extension |
| Source video | Test 3, 8 seconds |
| Added duration | 5 seconds |
| Final duration | 13 seconds |
| Resolution | 720p |
| Audio | Enabled |
| Extension cost | 52.8 credits |
| Generation time | About 3 minutes |
Our prompt:
She jumps and spins as the rain grows heavier. Lightning flashes above the city, the camera rises over the rooftop, and the music builds in intensity.
What happened
The video continued smoothly. The character kept moving, the rain became heavier, and lightning appeared above the city.
The final clip lasted 13 seconds.
Importantly, the extension was charged only for the five newly generated seconds. The original eight-second clip cost 84.48 credits, while the extension cost another 52.8 credits.
Together, the complete sequence used 137.28 credits.
Verdict: Video extension is useful when you already like the beginning of a clip but want to add a final action, develop the scene, or continue the camera movement.
Total Cost and Generation Time
| Test | Generated duration | Generation time | Cost |
|---|---|---|---|
| V6 Max: Photo animation | 8 sec | ~2 min | 105.6 credits |
| V6: Frame transition | 5 sec | ~1.5 min | 52.8 credits |
| V6: Reference-based dance | 8 sec | ~2 min | 84.48 credits |
| V6: Video extension | +5 sec | ~3 min | 52.8 credits |
| Total | 26 sec generated | ~8.5 min | 295.68 credits |
The entire experiment used 295.68 credits. Combined generation time was approximately 8.5 minutes.
Across these tests, the models completed each task in about 1.5–3 minutes, consistent with the usual generation time of 1–3 minutes.
The biggest takeaway is that the available modes serve genuinely different purposes. V6 Max animated our original portrait, while V6 gave us more control over transformations, visual references, and continuing an existing scene.
How to Use PixVerse in Neuromia: Step by Step
Both PixVerse versions are available directly in the Neuromia browser-based editor. You don't need to install separate software or manage a different account for each model.
For an overview of the available tools, visit the PixVerse AI model page.
Step 1. Create a Neuromia Account
Sign up for Neuromia to access the video editor.
New accounts receive 10 starter credits. Most video generations require additional credits, which you can purchase from the Pricing page.
Step 2. Select Your Model
Open the video editor and choose PixVerse V6 or V6 Max.
Both support text-to-video and image-to-video generation. For frame transitions, image references, multi-clip generation, and extensions, choose V6.
Step 3. Choose a Generation Mode
Depending on your model, you can:
- Text-to-video: Describe a scene without uploading an image.
- Image-to-video: Upload an image to use as the opening frame.
- Frame transition: Provide the first and last images.
- References: Upload 1–7 images defining characters, objects, or backgrounds.
- Multi-clip: Generate multiple shots with changing camera angles.
- Extension: Continue an existing PixVerse video.
The final four options are exclusive to V6.
Step 4. Write Your Prompt
Describe the subject's actions, camera movement, lighting, and desired audio.
For example:
A girl looks out over the city, slowly turns toward the camera, and smiles. Her hair moves gently in the breeze. Soft purple neon lighting and a slow cinematic camera push-in.
Prompts can be up to 5,000 characters long.
Step 5. Adjust Video Settings
Choose a duration between 1 and 15 seconds, with one-second increments.
Select 360p, 540p, 720p, or 1080p, and enable or disable audio.
The editor also supports different aspect ratios and a seed parameter for repeatability. For image-to-video, the output follows the uploaded image's proportions.
Step 6. Generate Your Video
Review the credit cost displayed in the editor and submit your generation.
Results usually take 1–3 minutes. If the model rejects a generation, Neuromia automatically refunds the credits.
PixVerse V6 and V6 Max Pricing: How Much Do Videos Cost?
Neuromia uses a credit-based system. You pay according to the number of generated seconds rather than purchasing a separate PixVerse subscription.
The total depends on your model, resolution, video duration, and whether audio is enabled.
PixVerse Pricing Per Second
All prices below are in credits per second of generated video.
| Resolution | V6 without audio | V6 with audio | V6 Max without audio | V6 Max with audio |
|---|---|---|---|---|
| 360p | 4.4 | 6.16 | 5.28 | 7.92 |
| 540p | 6.16 | 7.92 | 7.92 | 9.68 |
| 720p | 7.92 | 10.56 | 9.68 | 13.2 |
| 1080p | 15.84 | 20.24 | 19.36 | 24.64 |
At the same settings, standard V6 costs fewer credits than V6 Max.
Audio also affects the price. For example, V6 at 720p costs 7.92 credits per second without audio and 10.56 credits per second with audio.
Example Video Costs
Here's what common video lengths cost at 720p with audio enabled.
| Model | 5 seconds | 8 seconds | 15 seconds |
|---|---|---|---|
| PixVerse V6 | 52.8 credits | 84.48 credits | 158.4 credits |
| PixVerse V6 Max | 66 credits | 105.6 credits | 198 credits |
For example, an eight-second V6 video at 720p with audio uses 84.48 credits.
If you're experimenting with several prompts, you can reduce credit usage by choosing a shorter duration, lowering the resolution, or turning off audio.
How to Get PixVerse Credits
You can top up your Neuromia balance on the Pricing page.
Credits are shared across supported models and creative tools, including AI video, image, music, and text generation. You don't need separate balances for PixVerse V6 and V6 Max.
The editor displays the required credits before each generation, so you can adjust your settings before committing to a render.
PixVerse Prompt Tips: How to Get Better Control
A useful PixVerse prompt describes more than what the scene looks like. It should explain how the action unfolds: what moves first, what the camera does, how the environment changes, and what the audience should hear.
Here are five practical techniques based on the available tools and our tests.
1. Describe Actions in Sequence
Instead of writing "a girl smiles," specify the order of events.
For example:
A girl looks out the window, turns toward the viewer, smiles, and brushes her hair aside. The camera slowly moves closer.
This gives the model a sequence to work with rather than a single visual description.
We used a similar approach in our first test. V6 Max followed the main actions, although it also added an unrequested wave.
2. Give the Camera Its Own Instructions
Camera direction can make a short AI-generated video feel much more deliberate.
Useful phrases include:
- "Slow cinematic camera push-in."
- "The camera smoothly orbits the character."
- "The camera rises above the rooftop."
- "Cut from a wide shot to a close-up."
In our rooftop test, the orbiting camera added movement to the dance. During the extension, raising the camera helped develop the scene.
For multiple shots with changing angles, V6 also offers multi-clip generation from text or a single image.
3. Reference Images With @image_1
When using the reference mode in V6, identify uploaded images directly in your prompt.
For example:
@image_1 stands next to the object shown in @image_2. Neon lighting, with the camera slowly moving from right to left.
The first image defines the character; the second defines the object.
You can use up to seven photo references, and the final image can be assigned as the background.
Our dance test used just one reference, which was enough to create a recognizable character in a new environment.
4. Use Start and End Frames for Precise Transitions
If a specific final composition matters, provide it as an image rather than relying entirely on text.
Upload the opening and ending frames, then describe how the transition should happen.
For example:
Smoothly transform the opening scene into the final frame. The lighting becomes warmer, the character's outfit changes, and the camera moves closer.
We used this technique to transform our character into a singer at a studio microphone.
It gives the model a visual target for the ending instead of asking it to invent one.
5. Include Audio and Scene Progression
PixVerse supports generated music, sound effects, and dialogue with lip synchronization.
Include the intended audio style in your prompt:
Upbeat electronic music, gentle rain sounds, gradually increasing intensity.
When extending a video, focus on what should happen next rather than repeating the original scene description.
For example:
The rain intensifies, the character spins, lightning flashes above the city, and the music builds.
That approach worked in our extension experiment.
For more examples, see our guide on how to write prompts for AI video.
PixVerse Limitations and Troubleshooting
PixVerse offers several creative modes, but there are some limitations worth knowing before generating.
15 seconds per generation. Both versions have a maximum duration of 15 seconds for a single run. To create a longer scene, use the extension feature in V6.
Strict content moderation. The model may reject revealing or otherwise inappropriate images. If that happens, try a more neutral source photo featuring everyday clothing and a standard pose.
Photo-only references. V6's reference-based scene mode accepts still images, not video files. If you need video or audio references, consider a different model.
Prompts aren't always followed literally. In our first test, PixVerse added a wave that wasn't part of the instructions. For a specific ending composition, a start-to-end transition offers more control.
Rejected generations. If a generation is rejected, Neuromia automatically refunds the credits. Check the task status and your balance before retrying with a revised prompt or image.
PixVerse Alternatives Available in Neuromia
PixVerse isn't the only AI video model available in Neuromia. Depending on your project, Kling 4.0, Seedance 2.0, MiniMax H3, or Veo 3.1 may be worth considering.
| Model | When to choose it |
|---|---|
| PixVerse V6 / V6 Max | For animating photos and generating structured scenes; choose V6 for frame transitions, references, multi-clip generation, and video extension |
| Kling 4.0 | When you need videos up to 30 seconds with audio in a single generation, keyframes, and references through @mentions |
| Seedance 2.0 | When your scene needs image, video, or audio references; supports videos up to 15 seconds |
| MiniMax H3 | When stereo audio and resolution up to 2K matter; supports videos up to 15 seconds |
| Veo 3.1 | When you want eight-second videos with audio at resolutions up to 4K |
For example, if 15 seconds isn't enough for a single generation, Kling 4.0 supports up to 30 seconds. If you need to supply an existing video or audio recording as a reference, Seedance 2.0 offers options that PixVerse's photo-reference mode doesn't.
You can explore more options in our AI video generator comparison.
FAQ: PixVerse V6 and V6 Max
Can I Try PixVerse Before Buying Credits?
Neuromia provides 10 starter credits when you register. However, most video generations require more credits. For example, a five-second V6 video at 360p without audio costs 22 credits. You can check the exact cost before starting.
What Is the Maximum Video Length in PixVerse?
Both V6 and V6 Max generate videos from 1 to 15 seconds in a single run, with one-second increments. To create a longer video, use V6's extension feature to add another 1–15 seconds per generation.
How Do I Animate a Photo With PixVerse?
Open the Neuromia video editor, select V6 or V6 Max, and choose image-to-video mode. Upload your image, describe the subject's movements and camera direction, then select the duration, resolution, and audio settings. Review the credit cost and start generating.
What's the Best PixVerse Alternative?
It depends on your project. Kling 4.0 supports videos up to 30 seconds per generation. Seedance 2.0 accepts video and audio references as well as images. MiniMax H3 supports stereo audio and resolution up to 2K, while Veo 3.1 generates eight-second videos with audio at up to 4K.
What Happens If PixVerse Rejects My Generation?
If the model rejects a generation, Neuromia automatically refunds the credits. Check the task status and your credit balance. If the rejection is related to content moderation, revise the source image or prompt before trying again.
Does PixVerse Support Audio and Lip Sync?
Yes. Both V6 and V6 Max can generate synchronized audio, including music, sound effects, and dialogue with lip synchronization. Audio is optional and increases the per-second credit cost. You can see the updated price before generating.
Final Verdict: Is PixVerse V6 Worth Trying?
After four hands-on tests, PixVerse proved useful for more than simply animating still images. V6 Max preserved our character and apartment while adding natural movement, while V6 handled a frame transition, a reference-based dance scene, and a smooth video extension. All four generations used 295.68 credits, with each taking approximately 1.5–3 minutes.
The main limitations are the 15-second generation cap, strict image moderation, and the fact that advanced creative modes are available only in V6. If you want to see how either version handles your own photo or prompt, open the PixVerse editor in Neuromia, choose your settings, and review the credit cost before generating.